 blog
Best Montessori Activities for Toddlers: A Parent's Guide
Table of Contents
- Why the Best Montessori Activities for Toddlers Start With Real Life
- Montessori Activities for 2-Year-Olds: Matching Skills to Readiness
- Montessori Practical Life Activities for Toddlers: Pouring, Spooning, and Caring for a Space
- DIY Montessori Activities for Toddlers Using Everyday Materials
- Montessori Activities at Home: Setting Up a Shelf That Works
- Safety, Supervision, and Choking Hazards: What Parents Need to Know
- How to Observe Progress Without Turning Play Into a Test
- Conclusion
- Frequently Asked Questions
Last Updated: October 21, 2026
Why the Best Montessori Activities for Toddlers Start With Real Life
The best Montessori activities for toddlers are not toys. At Maria's Meadow Montessori School, we build our toddler rooms around that idea because it holds up in practice.
That is the throughline of this guide.
Here is what most activity lists get wrong: they sort ideas by how cute they look, not by what the developmental stage actually asks for. A 14-month-old and a 28-month-old need very different work.
Montessori Activities for 2-Year-Olds: Matching Skills to Readiness
Montessori activities for 2-year-olds should match what the child's hands and body can already do, then stretch it slightly. Readiness, not age alone, decides when to introduce a task.
A common mistake is starting too hard. A toddler handed tweezers before she can pick up a pom-pom with her fingers will quit in frustration and avoid the shelf for days.
Use the two bands below as a starting map, not a test.
12 to 24 Months: Sensory Play and Gross Motor Exploration
The young toddler needs movement first. Gross motor skills come before fine control, so build the day around climbing, walking, carrying, and sensory play.
Try these:
- A low step or firm cushion to climb and balance on, placed next to a wall or low furniture for a handhold
- A basket of large, safe objects to carry from room to room, a wooden spoon, a rolled sock, a soft ball
- A rice bin or shallow water basin for scooping with a big cup; set it on a towel and keep the basin no deeper than a couple of inches
- Carefully carrying a light basket with two hands, then setting it down without dropping it
- Language development work: naming objects on a walk, one word at a time, waiting for the child to point or echo
- A posting box with a large slot and big wooden coins for early hand-eye work
- A first puzzle with two or three chunky pieces and knobs
Keep sessions short. Ten minutes of real interest beats thirty minutes of adult-led drilling.
To simplify: use bigger scoops, fewer objects, and a wider container. To extend: add a second color to sort, or move the basket across the room so the child has to carry it farther.
24 to 30 Months: Fine Motor Precision and Early Independence
By 24 to 30 months, the hands are ready for more precision. This is where fine motor skills work earns its place: transferring, sorting, color sorting, and simple puzzles.
Good starting points:
- Spooning beans or large lentils from one bowl to another, with a small sponge or brush nearby for spills
- Sorting two colors of large buttons or pom-poms into two dishes
- Matching cards with identical pictures, starting with three pairs and building to six
- A lock box or screwdriver board for wrist control
- Clothespins squeezed onto the rim of a plastic container
- A puzzle with four to six pieces and picture cues under each piece
- Pouring dry rice between two small pitchers before moving to water
Each task should be doable in one sitting and end with a clear finish, so the child feels the independence of "I did it."
To simplify: reduce the number of objects, use a wider-mouthed pitcher, or pre-sort so only two choices remain. To extend: add a third color, a smaller opening, or a sequence of two steps (sort, then carry the dish to the shelf).
How to Tell If the Work Is the Right Fit
Readiness shows up in behavior, not in a checklist. A child who is ready will choose the activity more than once, stay with it for several minutes, and repeat the motion without prompting. A child who is not ready will dump the tray, wander off, or ask for help immediately.
When frustration rises, make the task easier rather than more rewarding. Do not quiz, do not clap for every pour, and do not turn the shelf into a scoreboard. Concentration grows when the child works for the task itself.
Montessori Practical Life Activities for Toddlers: Pouring, Spooning, and Caring for a Space
Montessori practical life activities for toddlers are the heart of the method: real tasks that care for the child, the room, or other living things. They build concentration and hand-eye coordination because the child sees a real outcome.
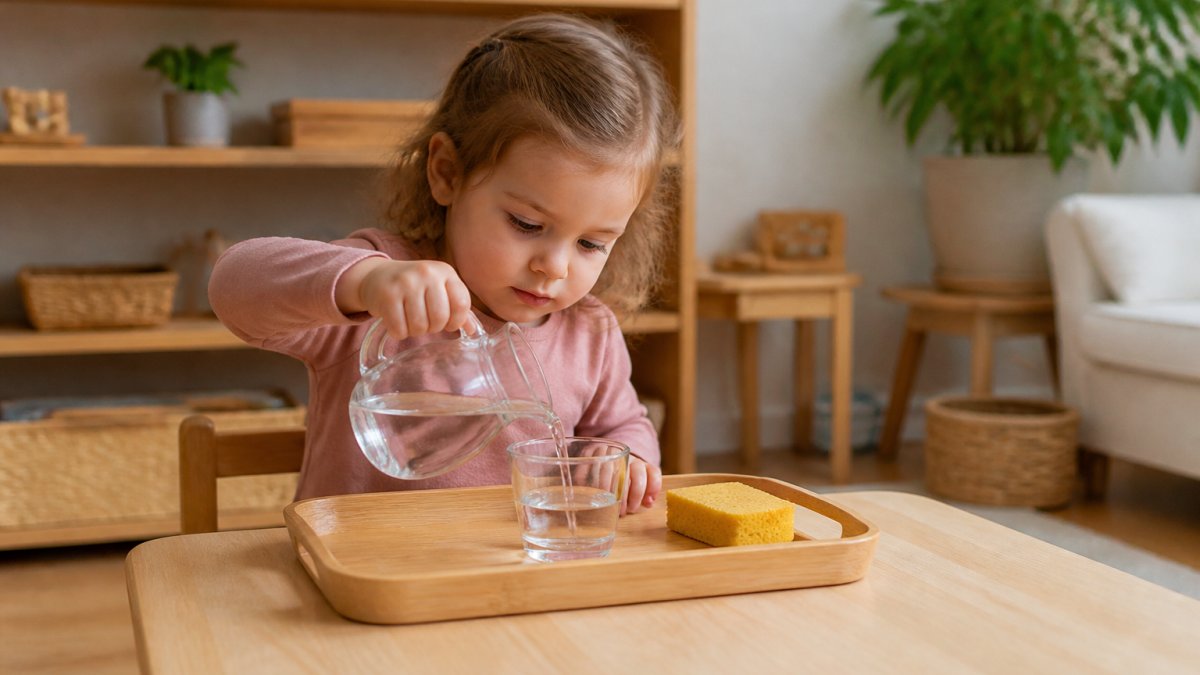
Pouring practice comes first with dry goods, then water. Set a small pitcher, a cup, and a sponge on a tray. Show the motion once, slowly. Then let the child pour, spill, and wipe it up. The spill is part of the lesson, not a failure.
Add these as the child is ready:
- Spooning rice or lentils between two bowls
- Flower arranging with a small vase and cut stems
- Watering plants with a child-sized can
- Setting the table with real utensils
- Wiping a table with a damp cloth
DIY Montessori Activities for Toddlers Using Everyday Materials
DIY Montessori activities for toddlers cost very little because the materials are already in your kitchen. A tray, a bowl, a pitcher, and a scoop do more than most plastic toys.
Start with what you own:
- Two bowls and a spoon for transferring
- A muffin tin and large buttons for sorting
- Clothespins and a plastic lid for squeezing
- A shallow rice bin with cups and scoops
- A basket of safe kitchen tools for carrying and exploring
Rotate, do not pile up. Keep four to six activities out and store the rest. When interest fades, swap one back in. This keeps the activity shelf fresh without buying anything.
For low-cost alternatives, skip the catalog. A cardboard box with a slot teaches the same drop-and-find lesson as a store-bought posting toy.
Montessori Activities at Home: Setting Up a Shelf That Works
Montessori activities at home work best when the activity shelf fits the child, not the room. A low shelf at the child's height, with a few trays in a row, invites independent play and self-choice.
Set it up like this:
- Put the shelf at the child's eye level
- Place one activity per tray, complete and ready
- Leave space between trays so hands do not knock neighbors
- Rotate weekly, not daily
- Keep a small work mat nearby to define the space
The goal is shelf work the child can start and finish alone. Fewer, better choices beat a crowded shelf every time.
Safety, Supervision, and Choking Hazards: What Parents Need to Know
Safety comes before any activity. Small objects are the main risk at this age, so check every material before it goes on the shelf. The practical details below are the ones most activity lists skip.
Screening for Choking Hazards
Use the small-parts choke test guidance from the Consumer Product Safety Commission to screen objects. A simple home version is a cardboard tube from a toilet-paper roll: if an object fits inside it with room to spare, it is too small for a child under three.
Check the whole tray, not just the obvious pieces. A safe wooden spoon can sit next to a tiny screw that rolled off a lock box. Run your hand over the tray before it goes on the shelf, and look for loose parts, cracked wood, and peeling paint.
Water Play
Supervise water play at all times, even shallow basins. Keep the water no deeper than a couple of inches, set the basin on a towel, and stay within arm's reach for the whole session. Empty the basin as soon as the child loses interest. Never leave a filled basin on the floor between sessions.
Tools and Materials
Choose child-sized tools with rounded edges: a small pitcher with a handle, a spoon with a short handle, blunt-tip scissors only after the child can follow a one-step instruction. Skip glass until the child's grip is steady, then introduce one small glass pitcher under close watch. Real materials teach care, but the first version should be the sturdiest one that still works.
Supervision Without Hovering
Supervision does not mean hovering. Stay close, watch quietly, and step in only for real danger. That balance is what lets independence grow while you stay safe. A useful rule: sit at the edge of the work area, keep your hands still, and speak only to name what you see ("You poured the water") rather than to correct.
Setup and Cleanup
Put a sponge or small towel on every pouring and transferring tray so the child owns the cleanup. Keep a small broom and dustpan near the shelf for dry spills. Check the shelf at the end of each day for missing pieces, and rotate out anything that has become loose or worn.
How to Observe Progress Without Turning Play Into a Test
Observation is a skill, and it is quiet. Sit back, watch what the child chooses, and note how long she stays with it. That tells you more than any checklist.
Watch for these signals:
- Does she repeat the task on her own?
- Can she finish without help?
- Does she choose it again next day?
- Where does frustration start?
When frustration rises, the task is too hard. Make it easier, not more rewarding.
This is where a prepared classroom helps. At Maria's Meadow Montessori School, our teachers observe each child and adjust the shelf to match, so progress is guided without pressure.
Conclusion
The hardest part of Montessori at home is not buying materials. It is trusting your toddler with real work and then resisting the urge to correct every spill.
If you want that approach guided by trained teachers in a prepared room, Maria's Meadow Montessori School is open and enrolling. Families choose us for our Montessori educational approach, our child-led classrooms, and a setting built to grow independence from the first day. Get started with Maria's Meadow Montessori School and give your child a space where curiosity leads the learning.
Frequently Asked Questions
What are the best Montessori activities for a 2-year-old at home?
Start with practical life tasks a 2-year-old can genuinely do: spooning dry rice between two bowls, pouring water from a small pitcher, wiping a spill with a sponge, and sorting a handful of large objects by color. These Montessori activities build fine motor skills and hand-eye coordination while giving your child real work to concentrate on. Keep materials on a low shelf, use child-sized tools, and rotate the selection every week or two so it stays fresh.
How long should a toddler spend on a Montessori activity?
Follow your child's lead rather than a timer. A young toddler may stay with a pouring or transferring task for five minutes; a 2.5-year-old might work for 20 to 30 minutes when the activity genuinely interests them. The goal of Montessori activities is concentration, not duration. If your child walks away, let them. Forcing more time turns play into a test and undermines the independence the activity is meant to build.
What household items can I use for DIY Montessori activities for toddlers?
You likely already own most of what you need: measuring cups, a small pitcher, spoons, tongs, clothespins, a muffin tin, cotton balls, and a low basin for water play. A cardboard box with a slot cut in the lid becomes a posting activity; a basket of safe kitchen utensils becomes a sorting task. Wash and inspect items first, skip anything small enough to swallow, and keep activities simple. Everyday materials work as well as store-bought sets.
How do I know if my toddler is ready for a particular Montessori activity?
Watch for signs of readiness: your child can sit unsupported, follows a simple one-step direction, and shows interest in the materials. Start with the simplest version, such as transferring large objects by hand before moving to a spoon or tweezers. If your child loses interest quickly or gets frustrated, the activity is likely too hard; if they finish in seconds, it is too easy. Adjust the size of the objects or the tool, and try again in a few days.